


Introduction
Swift is a compiled programming language designed by Apple. It is built using a modern approach to safety, performance, and software design patterns. Swift is used for developing iOS applications, macOS applications, watchOS applications, and tvOS applications. Also, it replaced Objective C which was used earlier for iOS and macOS applications development.
Swift was introduced by Apple at WWDC in 2014. With the launch of Xcode 6, Swift 1.1 was released. In 2015 with the release of Swift 2.2 it become an open source.
In this blog, we will start exploring the basics of Swift like how defining variables, constants, operators, strings, and type casting.
How to open a Playground
To run Swift programs we are going to use Xcode playground (Xcode is only available on macOS). So First open Xcode and
Press shift (⇧) + option (⌥) + command (⌘) + N keys together it will open below a window.
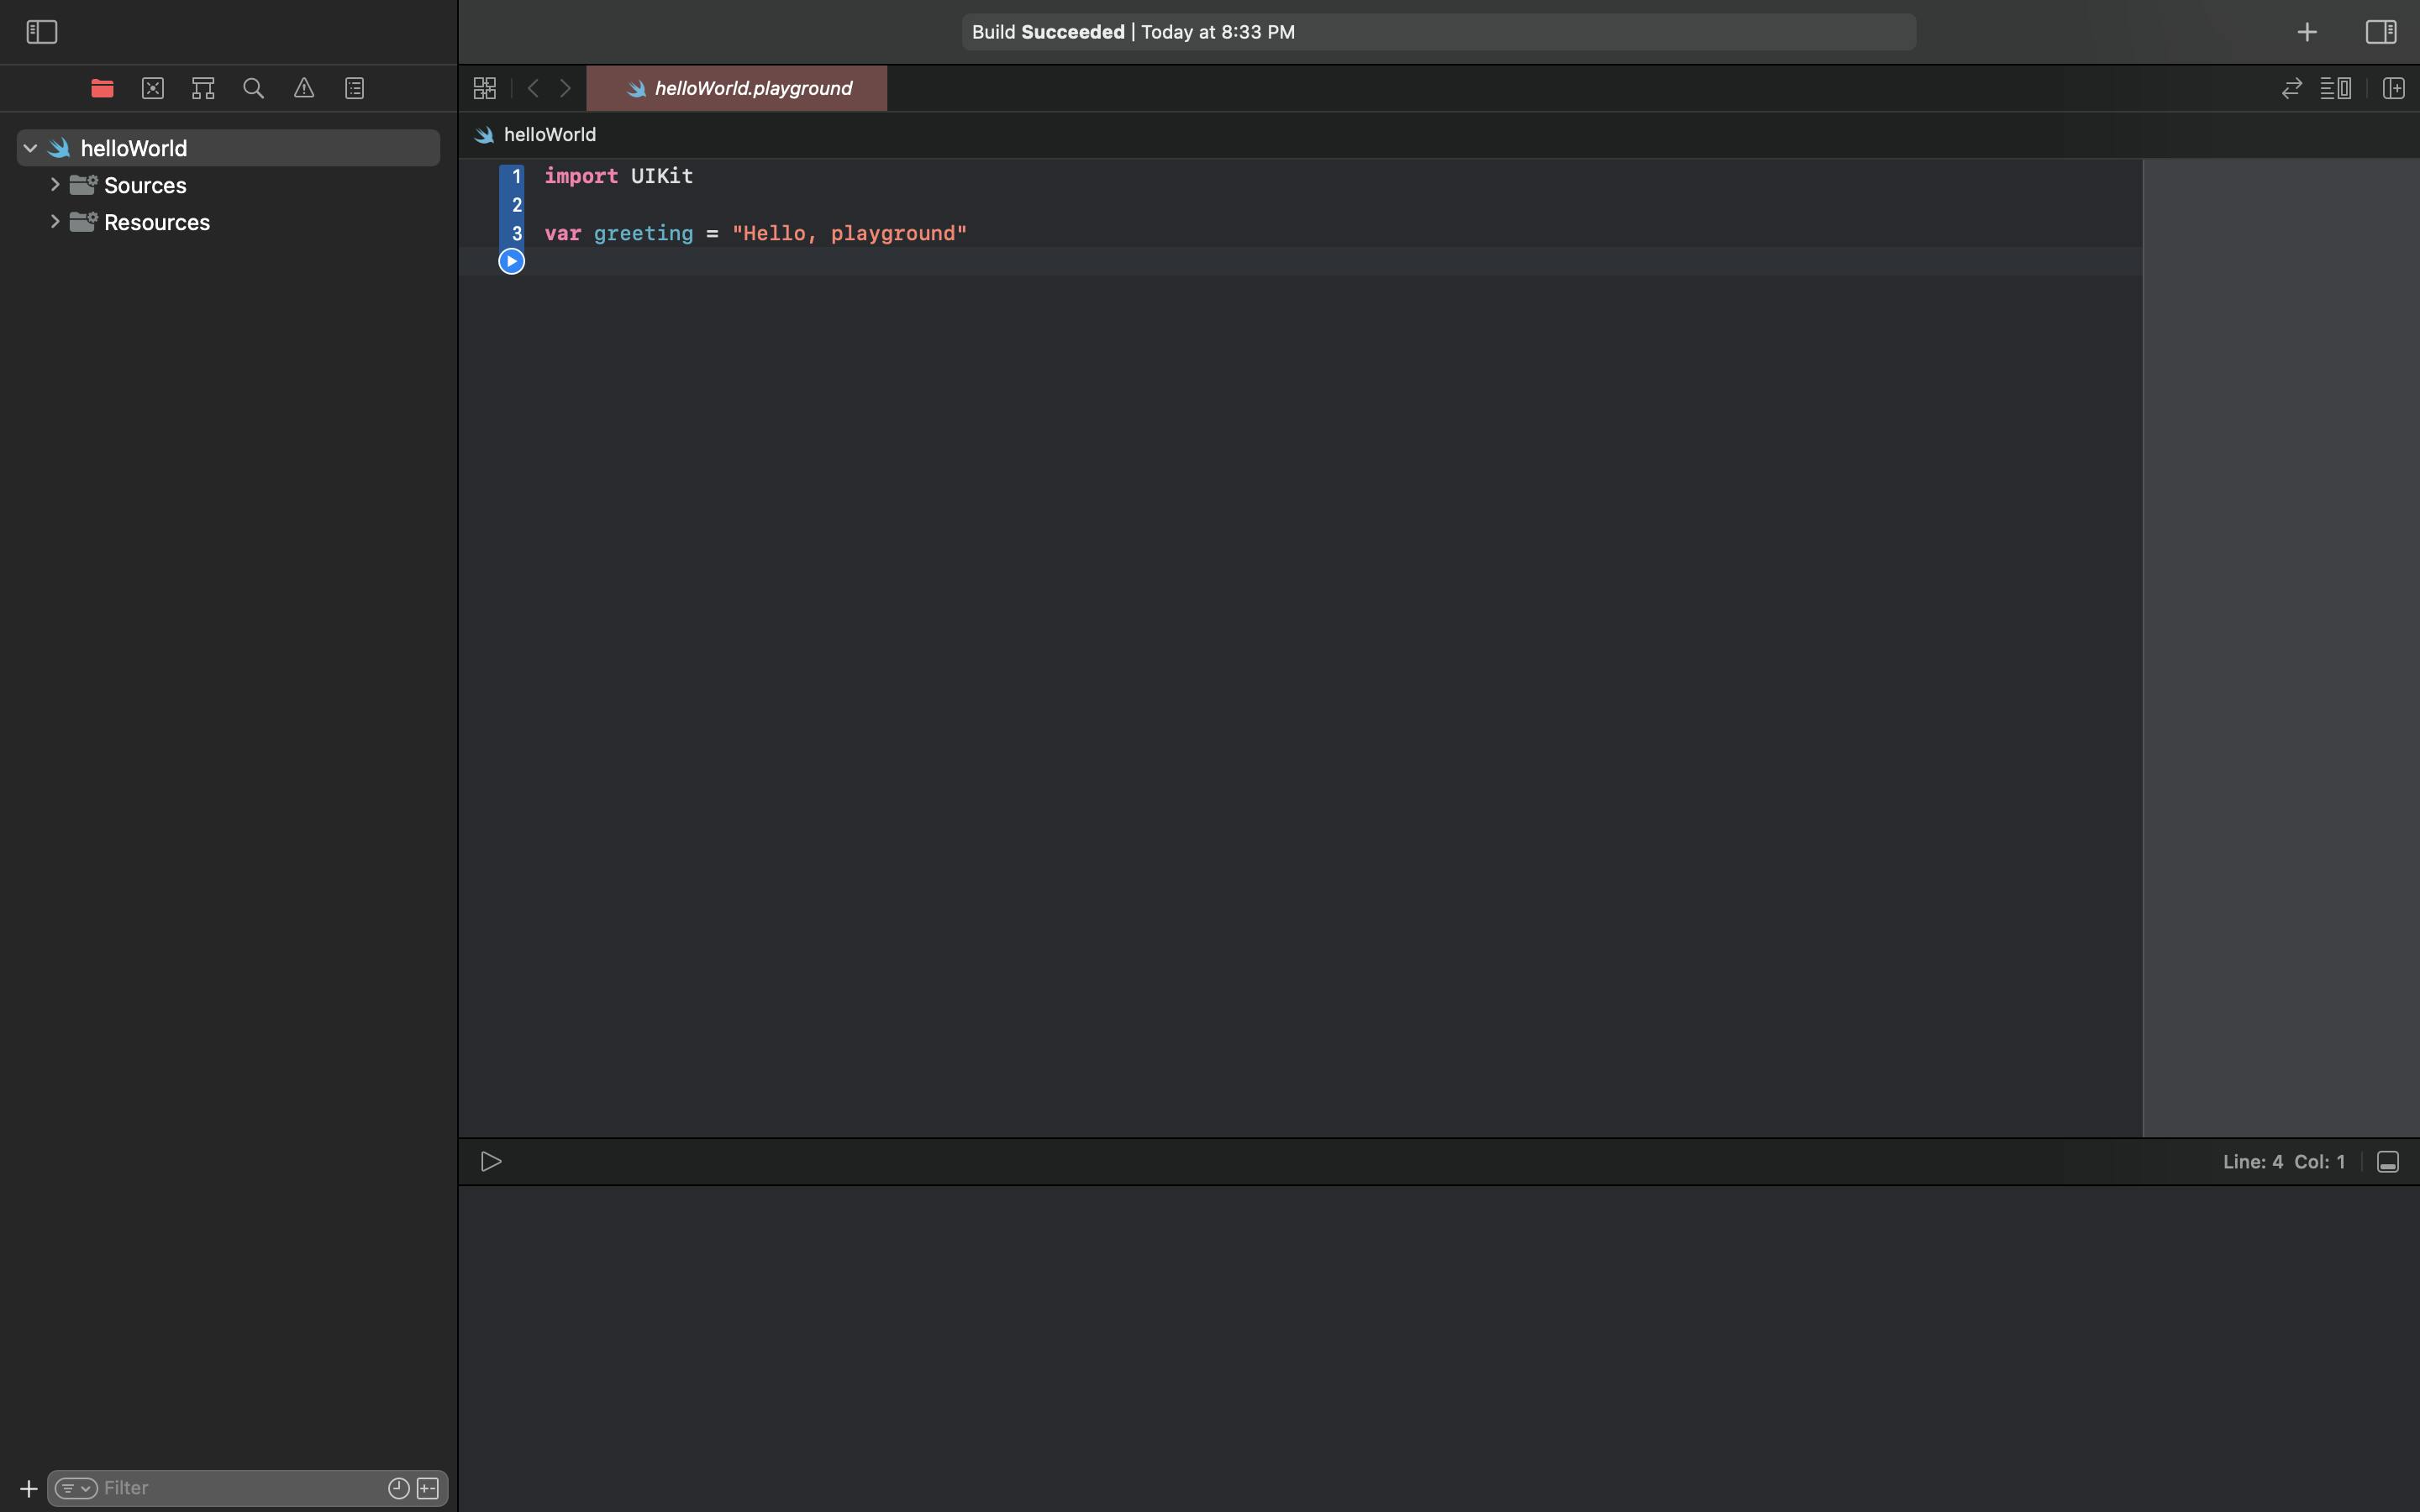
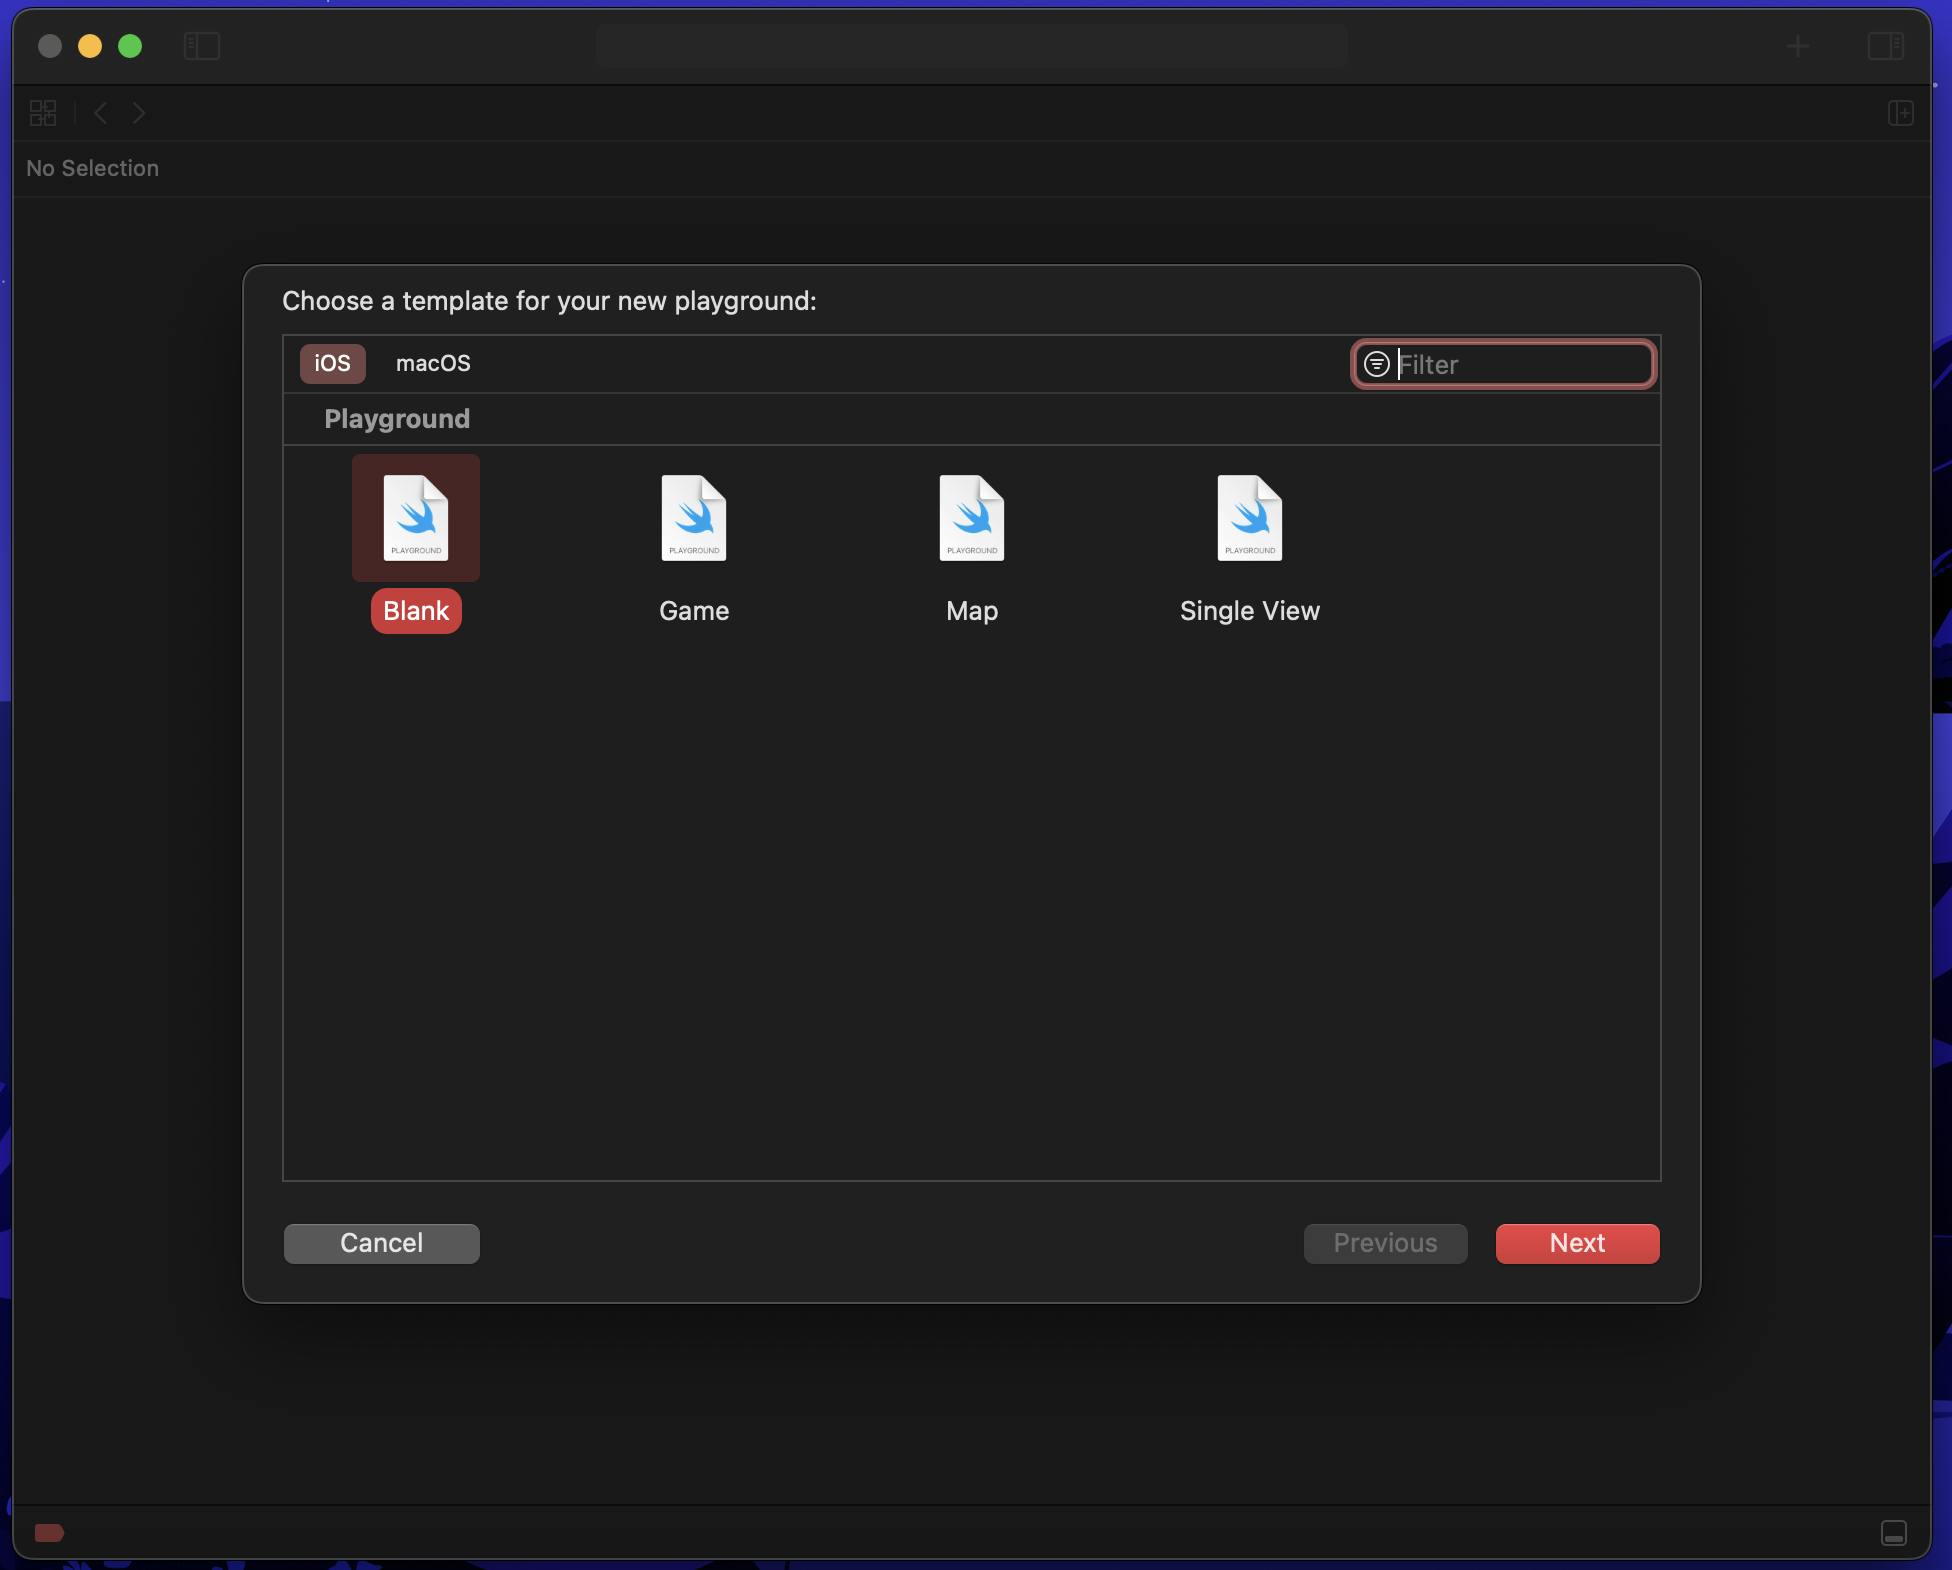 Then click on select Blank, click next and then choose a place where you want to create a file and click on create. You will see an environment like the one below and this is our Xcode playground.
Hello World in Swift
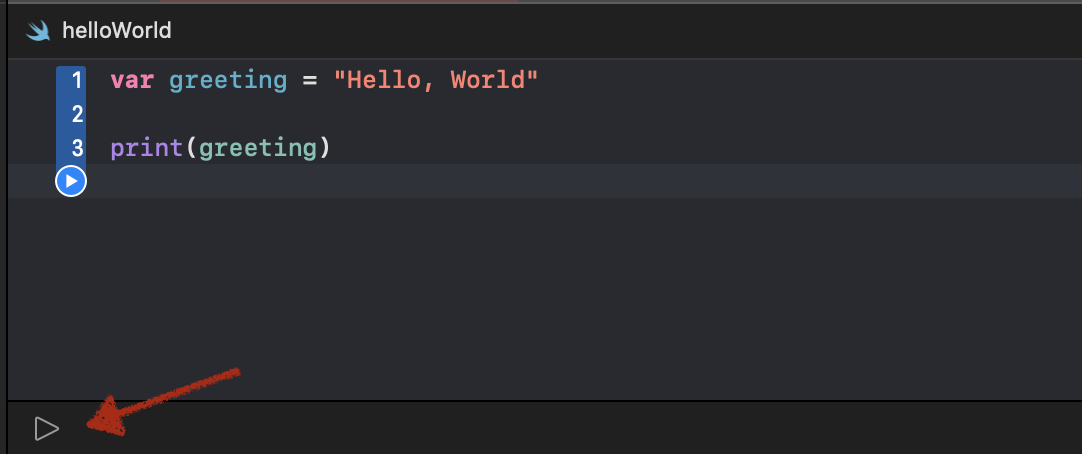
Remove all the code present in the Editor and add the below code snippet
var greeting = "Hello, World"
print(greeting)
then click on the run Icon at the bottom and you will see the output on the terminal.
Variables and Constants in Swift
Define Variables and constants
In Swift, we use var to define variables and let to define constants.
var username = "User Name"
let accountId = 12345
Also, we can change the value of an existing variable to another value of the same type. This means we can assign username other values of String type.
var username = "User Name"
username = "Name"
But unlike a variable, the value of a constant can’t be changed after it’s set.
let accountId = 257
accountId = 2
// Error message - Cannot assign to value: 'accountId' is a 'let' constant
Type Annotations
To specify the type explicitly to the variable and constant we can use the following syntax
var userName:String = "User Name"
//OR
var userName:String
userName = "User Name"
We can also follow this pattern to define multiple related variables of the same type on a single line, separated by commas, with a single type annotation after the final variable name.
var name, email, address: String
Naming Variables and Constants
- Constant and variable names can contain almost any character, including Unicode characters.
- Constant and variable names can’t contain whitespace characters, mathematical symbols, arrows, private-use Unicode scalar values, or line- and box-drawing characters. Nor can they begin with a number, although numbers may be included elsewhere within the name.
Operators in Swift
Swift supports the operators you may already know from languages like C, and improves several capabilities to eliminate common coding errors. Let's explore some of them.
Assignment Operator
We use the assignment operator to initialize or update the value. Like in the below code snippet we are assigning 100 to the price variable and 20 to the quantity constant.
var price:Int = 100
let quantity:Int
quantity = 20
If the right side of the assignment is a tuple with multiple values, then it can be extracted into multiple constants or variables at once.
var (name, email) = ("FName", "email@domain.com")
We can also do the Compound Assignment in swift which looks something like this
//Compound Assignment Operator
var x = 5
x += 5
here x += 5 means x = x + 5 .
Arithmetic Operators
Swift supports the 4 standard arithmetic operators Addition(+), Subtraction(-), Multiplication(*), and Division(/) which behave the same as we have seen in any other programming language.
//Arithmetic Operators
let a = 5
let b = 4
a + b
a - b
a * b
a / b
Remainder Operator
Swift also has a Remainder Operator (%) also known as a modulo operator which returns the remainder.
//Remainder Operator
11 % 4
//Output: 3
Comparison Operators
In Swift, we can use comparison operators such as less than (<), less than or equal to (<=), greater than (>), greater than or equal to (>=) equal to (==), and not equal to (!=).
//Comparison Operators

let firstValue = 5
let secondValue = 4

firstValue >  secondValue
firstValue <  secondValue
firstValue >= secondValue
firstValue <= secondValue
firstValue == secondValue
firstValue != secondValue
Logical Operators
Swift also supports the three standard logical operators as Logical NOT (!), Logical AND (&&), and Logical OR (||).
Logical NOT operator! inverts the boolean. for example, true becomes false, and false becomes true.
In Logical AND to result in the whole logical expression as true both values need to be true. if one of them is false the logical expression will be also false.
Whereas in Logical OR if one of the two values is true the logical expression will be true. and if both are false then the logical expression will be also false.
//Logical Operators
let isEmailValid = true
let isPasswordValid = false

!isEmailValid
isEmailValid && isPasswordValid
isEmailValid || isPasswordValid
Range in Swift
Swift has several types of range operators which help us to express a range of values.
Closed Range Operator
The Closed range operator defines the range that runs from lowerBound to upperBound.
    //Closed range operator syntax: lowerBound...upperBound
    let rangeValue = 1...10
Here the lowerBound is 1 and the upperBound is 10 and rangeValue includes the values between 1 to 10. One important point is that the lowerBound should not be greater than the upperBound.
Half-Open Range Operator
The Half-Open range operator defines a range that runs from lowerBound to upperBound but doesn’t include the upperBound value.
    // Half-Open range operator syntax: lowerBound...<upperBound
    let halfOpenRange = 1..<10
Here the lowerBound is 1 and the upperBound is 10 and rangeValue includes the values 1 to 9 only and excludes the 10. Here also the same condition of lowerBound should not be greater than the upperBound is applicable.
One-Sided Ranges
The closed range operator has an alternative form for ranges that continue as far as possible in one direction.
   //One-Sided range operator syntax: lowerBound... or ...upperBound
   let oneSidedRanges = 1...
   oneSidedRanges.contains(10000) // true
Here the range is starting from 1 but we did not specify the end so it will contain every value after 1. To check that we used a function contains() and passed 1000 which will check if the range contains 10000 and will return a boolean true or false.
Strings
A string is a series of characters. Let's see some of the operations we can do on strings.
String concatenation
We can use + operator to concatenate two strings.
var greeting = "Welcome to playground"
var usename = "User Name"
print(usename + greeting)
String Interpolation
String interpolation is a way to construct a new string by combining constants, variables, and expressions by including their values inside a string literal.
var greeting = "Welcome to playground"
var usename = "User Name"
print("Message for \(usename): \(greeting)")
Multiline String Literals
let multilineString = """
Lorem ipsum dolor sit amet, consectetur adipisicing elit.
Eaque eveniet tempore id qui delectus cumque dolores! Fugit maiores quaerat tenetur.
"""
Extras
var greeting = "Welcome to playground"
var usename = "User"

usename.uppercased()   // make string upeercased
usename.contains("A")  //  check if string contains A letter
usename.count     //  get length of string
usename.isEmpty  //  check if variable is empty
usename.split(separator: " ")  //  spliting string with provided separator
usename.append(contentsOf: "A") // adds content at the end
//Initializing an Empty String
var emptyString = ""               // empty string literal
var anotherEmptyString = String()  // initializer syntax
// these two strings are both empty, and are equivalent to each other
Type Conversion
Type conversion is used to make a variable of one type compatible with the variable of another type to perform an operation.
let billedAmount = 100.2
Int(billedAmount) // converting billedAmount of  Double type to Int

let userAge = "20"
Int(userAge) // converting userAge of string type to Int
Optional variables and Forced unwrapping
Defining optional variable
We can define a variable as optional by appending ? to the type.
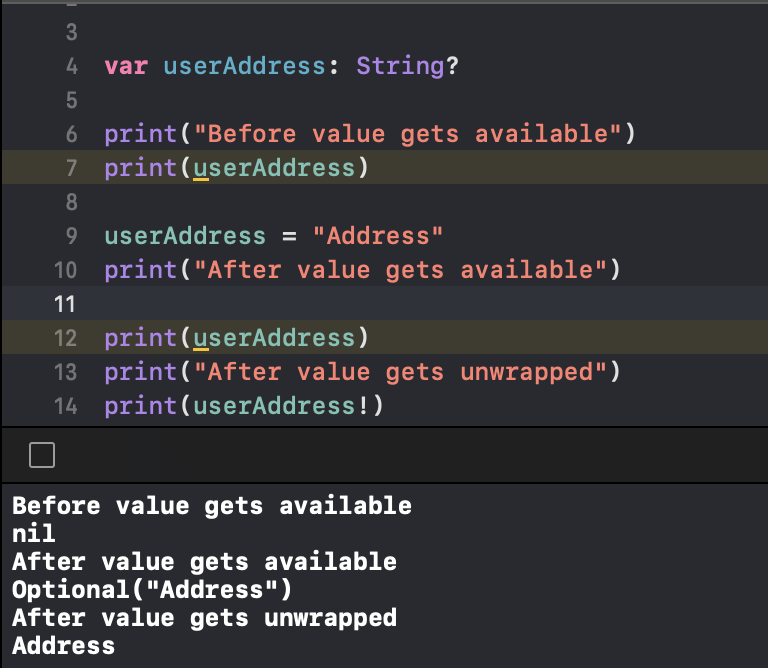
var userAddress: String?
When we don’t provide a value to an optional variable it contains a value as nil.
Forced unwrapping
When we define a variable as optional in such conditions those optional variables represent data that may or may not be there, but sometimes you know for sure that a value isn’t nil. In these cases, Swift lets you force unwrap the optional and convert it from an optional type to a non-optional type.
Suppose there is a field in a program that has a type as String and it can be optional also. When we don’t provide a value to an optional variable it contains a value as nil. but you are sure that an instance of optional contains a value, then you can unconditionally unwrap the value by using the forced unwrap operator (!) as a postfix to variable this is called forced unwrapping.
Example
var userAddress: String?
var message = "User address is " + userAddress
We declared a variable userAddress which is a type of string as well as optional. And we are concatenating that variable to a message variable. If we add the above code we will see an error message: Value of optional type 'String?' must be unwrapped to a value of type 'String’ and if we try to execute the program it will crash.
But still, we are certain that the value will be available at some point and if we want to execute then we can add ! after the variable name which will remove the error message.
var userAddress: String?
//Forced Unwrapping
var message = "User address is " + userAddress!
If we now try to run the program we will see an error Fatal error: Unexpectedly found nil while unwrapping an Optional value. This is because still, the value of userAddress is nil.
If that variable contains some actual value then it will execute correctly.
Example:
var userAddress: String?
userAddress = "Address" // value available
var message = "User address is " + userAddress!
At the end of this blog, we explored about
defining variables and constants and how to specify the types.
using different operators like arithmetic, comparison, and logical.
how range operators work in a swift.
strings and methods of strings.
type conversion
defining optional variables and how to deal with nil.